Clogged In-Ear Monitor (IEM) Filter? How to Fix It
From: Vitor Valeri
A headphone hobbyist for over 15 years, he founded the Hi-Fi Hub website and is an administrator of the "Fones High-End" and "Fones Low-End" groups on Facebook.
Published in: 17/02/26 at 14:29 - Updated in: 19/02/26 at 19:01
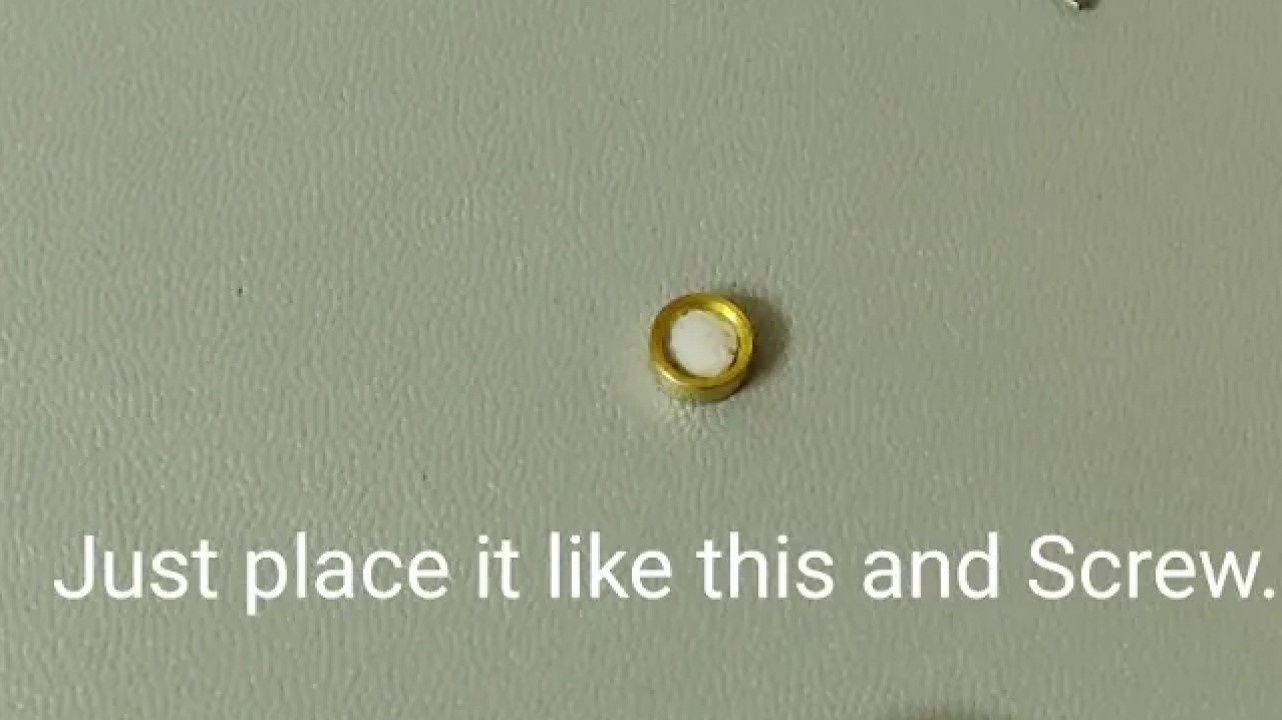
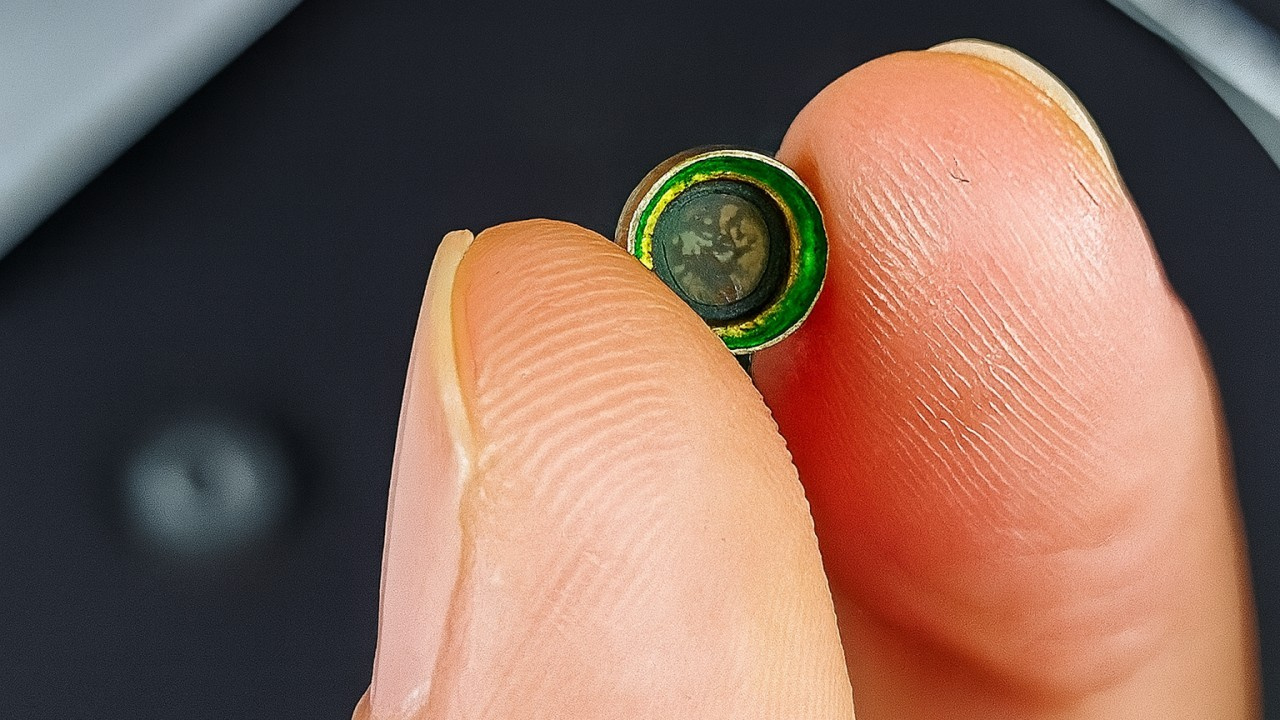 Solution to Fix a Clogged Filter Issue in an In-Ear Monitor (IEM) (Image: 404 Found/YouTube)
Reports of clogged in-ear monitor (IEM) filters have become increasingly common on the internet. The cases generally involve models from the Chinese manufacturer Moondrop, such as the Chu II, Aria 2, LAN, May, Kadenz, Robin, Quark, Starfield, Blessing 2, and Variations. Fortunately, there is a way to resolve the issue without purchasing a new filter, spending only a few cents.
Why not purchase original manufacturer filters?
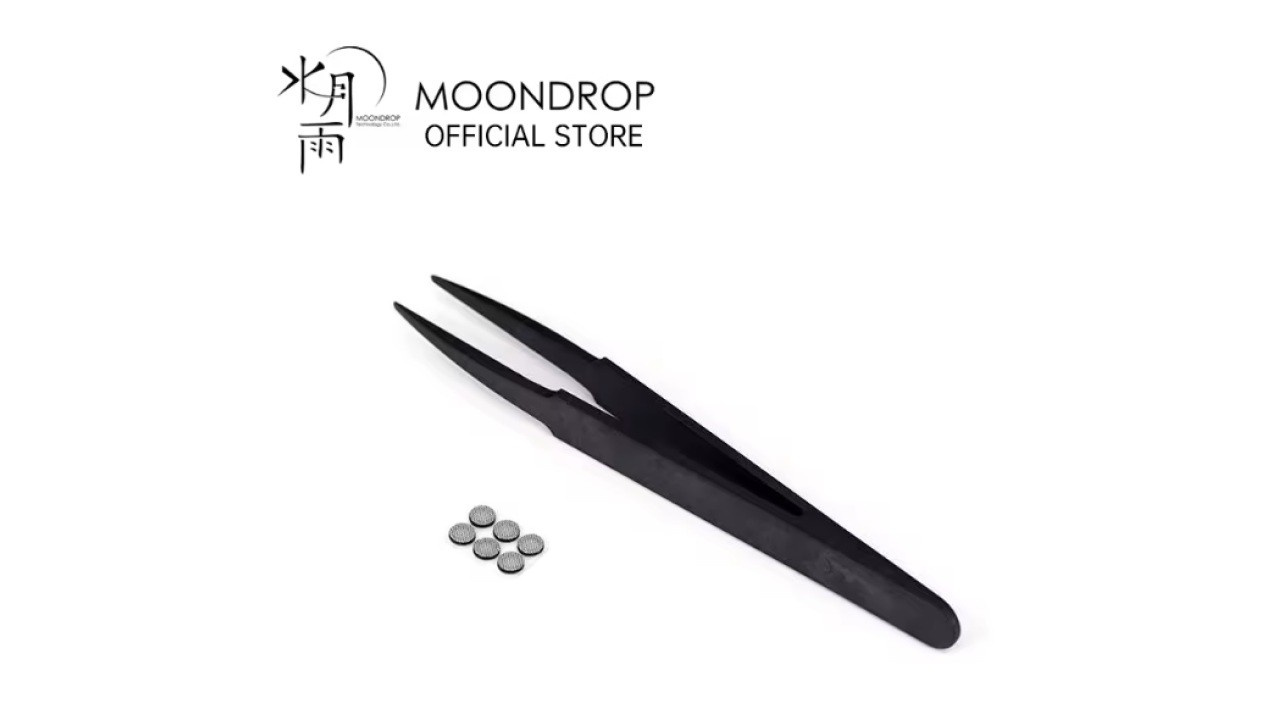
Depending on the price of the earphone, purchasing a set of replacement filters along with a precision tweezer, the recommended tool for replacement, can be costly. Moondrop, for example, sells a kit that includes 10 pairs of filters, a tweezer and two pairs of ear tips for US$10.99.
In addition to the relatively high cost, the likelihood of the earphone experiencing clogging issues again remains significant. In other words, even when purchasing an original Moondrop filter, there is no guarantee that the problem will not recur.
How to fix a clogged filter in in-ear monitors (IEMs)?
To resolve a clogged filter in in-ear monitors (IEMs), you will need the following materials:
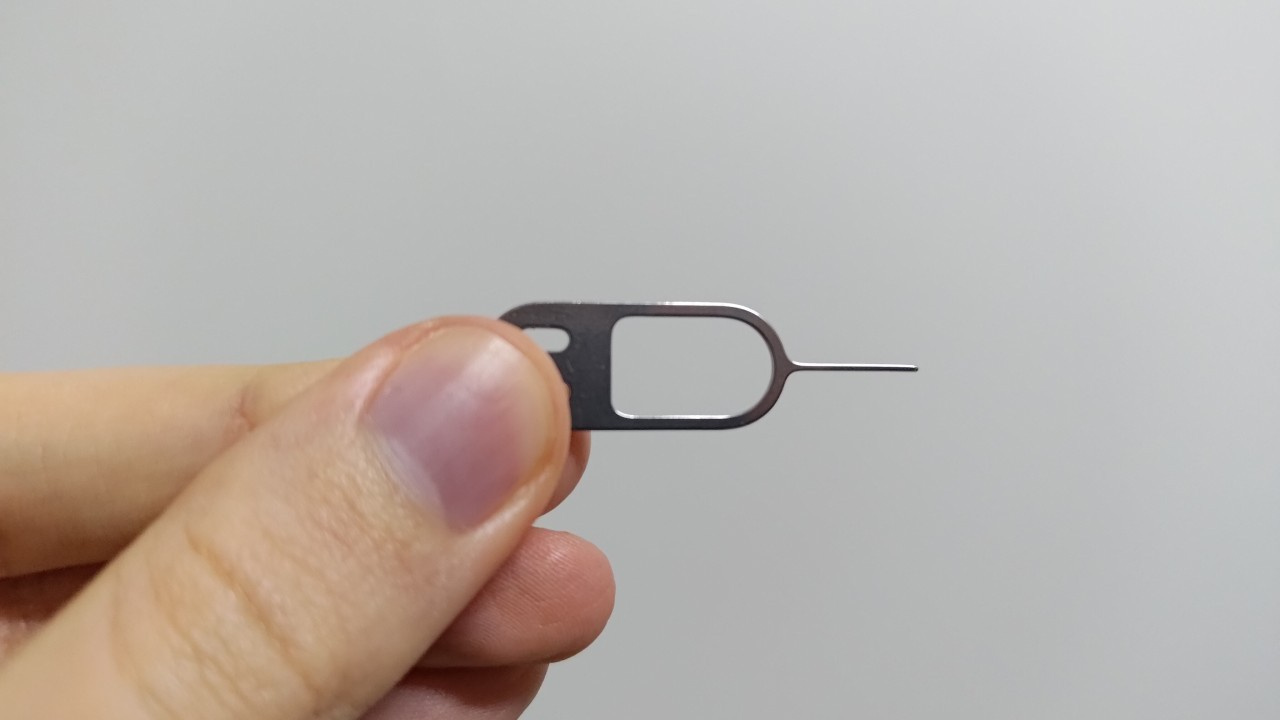
- 1 SIM card removal tool
- 1 disposable surgical mask
- 1 precision tweezer
- 1 pair of scissors
The objective is to use the fabric from the surgical mask as a replacement filter, substituting only the membrane adhered (or fitted) to the nozzle grille of the in-ear earphone. It is important to replace the filter on both sides to prevent channel imbalance. To perform the procedure, follow the steps below.
Warning: Replacing the original filters with non-original alternatives may slightly alter the sound signature. It is therefore up to you to test the modification and determine whether the result is satisfactory.
Step 01: If the earphone nozzle is threaded, unscrew it to facilitate filter replacement.
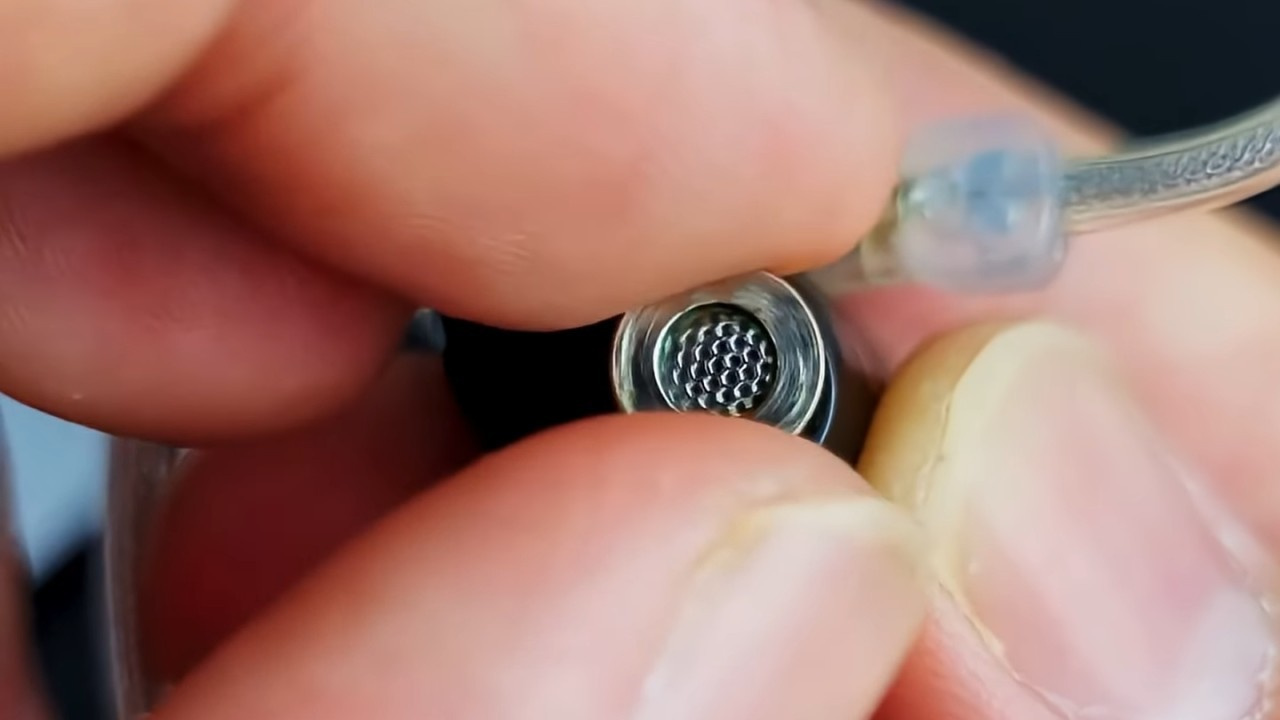
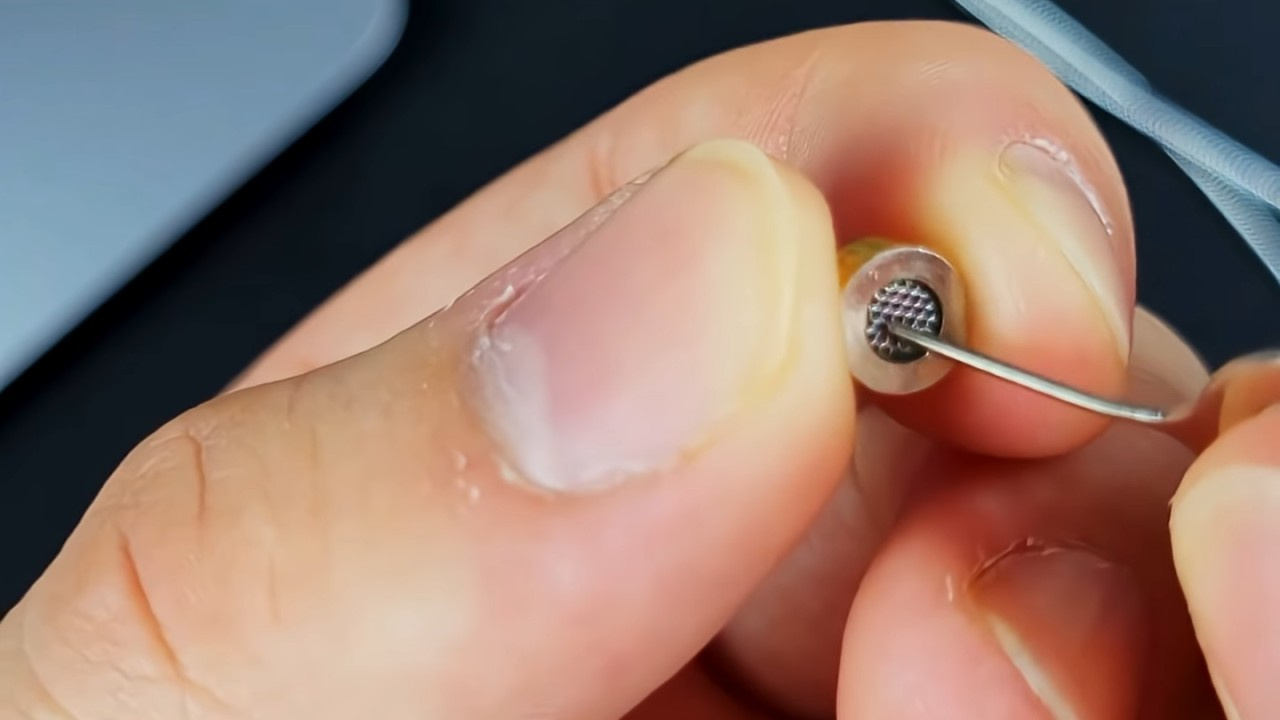
Step 02: If this is not possible, use precision tweezers with very fine tips, such as those shown in the image below. Insert one tip of the tweezers into the corner and gently lift the filter grille.

Step 03: In the case of a threaded nozzle, use the SIM card removal tool to push the protective grille from the outside inward.
Step 04: Clean the threaded nozzle and the grille.
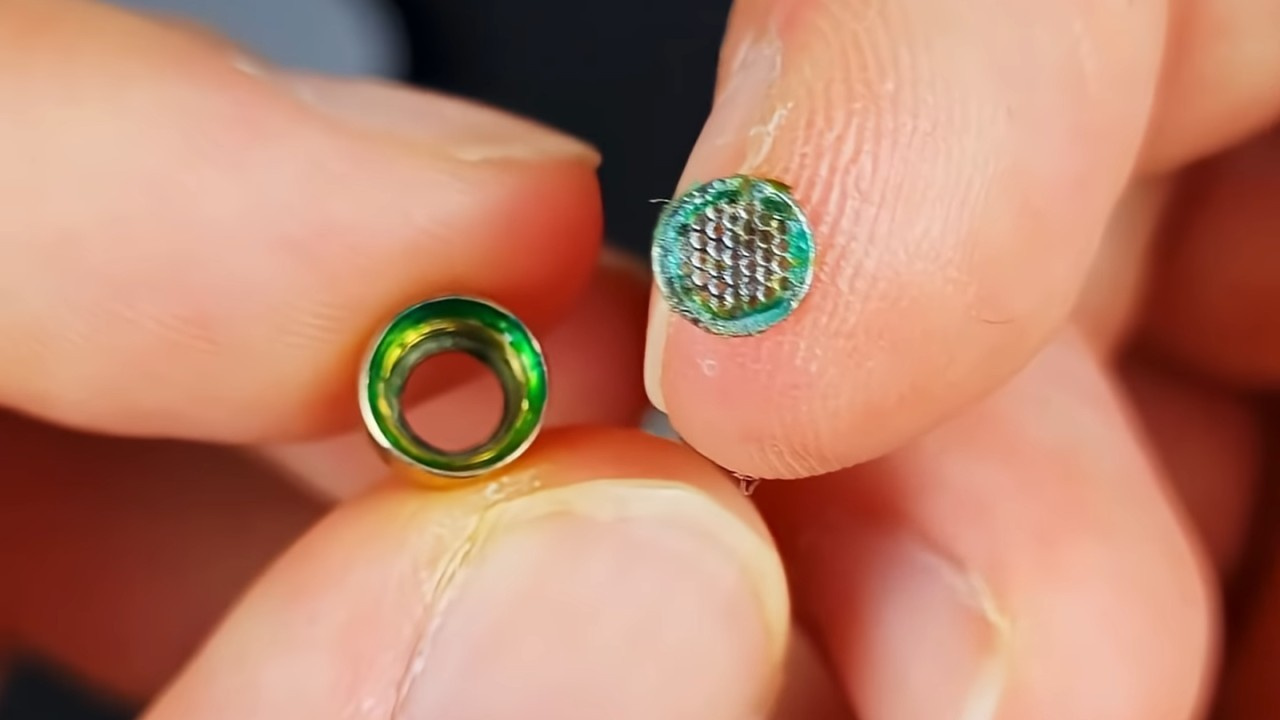
Step 05: Carefully remove the membrane/fabric (filter) adhered behind the grille to avoid tearing it.
Step 06: Use the removed membrane/fabric (filter) as a template to cut the surgical mask to identical dimensions with scissors. Cut two layers of surgical mask fabric to serve as the replacement filter for each side of the earphone.

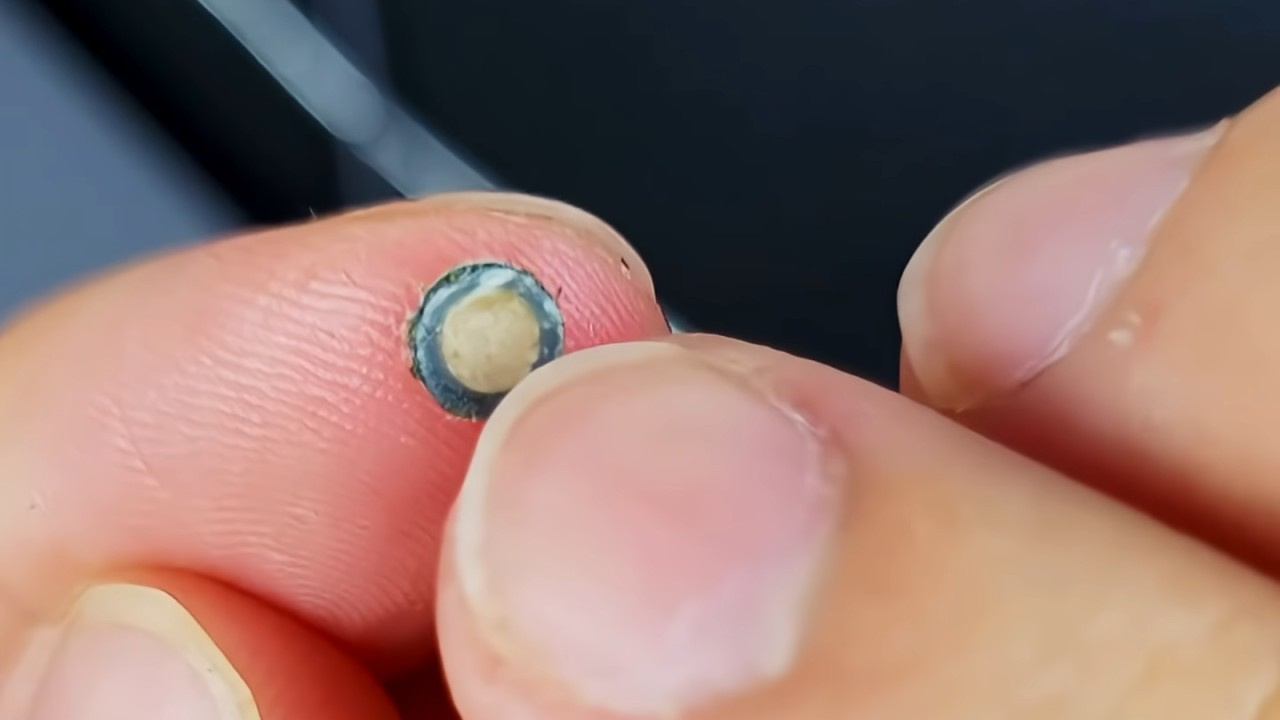
Step 07: Place the double layer of mask fabric behind the grille and reinstall it into the threaded nozzle. If your earphone does not feature a threaded nozzle, use the precision tweezers to reposition the grille and fabric back into the nozzle.
Once completed, you may once again enjoy your earphones without sound issues.
Credits
- Video “How to replace filters (MOONDROP earphones)” – Shenzenaudio YouTube channel
- Video “One Earbud Quieter? Here’s Why!” – 404 Found YouTube channel
- Video “Moondrop Chu 2/ Aria 2 IEMs Moisture Issue Fix!!! No more filter replacement needed!!!” – Hydrous YouTube channel
Share:


No comments have been made yet, be the first!